Showing posts with label Baking. Show all posts

Monday, 27 July 2015

Mummy Lunch Round Up

Some of the lunches I've been taking to work with me :-)

Spaghetti Marinara with parmesan and fresh parsley.

Pasta Bolognese with garlic butter dinner roll

Cheat chicken pie with lamington

Cheat chicken pie with passionfruit yoghurt kin

Wednesday, 3 June 2015

Minion Madness Yumbox

 Are you excited for the new Minions movie? Miss M hasn't watched the Despicable Me movies through yet, but she loves the Minion parts and is thoroughly looking forward to seeing this movie when it's released later this year.

I made her a Yumbox to celerbrate :-)
 Minion Tic Tacs, Minion Binkies, corn and a yellow tomato with Minion inspired nori cutting.
 Sandwich with Minion inspired nori cutting and yoghurt.
Banana!

There's also a Minion patty cake with edible wafer. These were a packet mix I bought on an impulse and included a few spare wafers in her lunch seeing as a few of the cakes mysteriously disappeared. . .


Details of my tools & toys can be found on this page.

~J

Disclosure: This is not a sponsored post. This post was written for Loving Lunches. No product was received for this post. All opinions expressed are my own, based on my personal experience with the product. This post may contain affiliate links.

Friday, 29 May 2015

Bread Repurpose - Meat Balls

Earlier this week I shared how simple it is to make breadcrumbs from your bread scraps (see this previous post) Now, I've been meaning to share this recipe for *ages* and admittedly I've changed the recipe a little each time I make these. But here's a good start!

Grate or finely dice one onion, one carrot, one stick of celery and a clove or two of garlic to taste.
Combine with one egg, one cup of breadcrumbs, and around 500g of your chosen mince. Beef or pork & veal are our favourites.
Roll tablespoonfuls into balls and place onto a lined, greased baking tray.
I julienned the carrots for this batch, but tend to grate them now.
Bake for around 20 minutes at 180 degrees until cooked through. You can glass with BBQ sauce for a tastier morsel.
I tend to serve with fettuccine, store bought pasta sauce and parmesan cheese. Also great for a leftovers lunch.


Details of my tools & toys can be found on this page.

~J

Disclosure: This is not a sponsored post. This post was written for Loving Lunches. No product was received for this post. All opinions expressed are my own, based on my personal experience with the product. This post may contain affiliate links.

Monday, 18 May 2015

Tinkerbell Tea Party

Our local cinema is great with fundraising! The most popular movies are premiered at a party to raise funds for assorted local groups and schools. Our Gymnastics club scored a double premier of TinkerBell & the NeverBeast and Cinderella. At intermission there was a TInkerBell Tea Party. I thought that was the perfect excuse to do a spot of baking!

These cute little toadstool cakes were a cinch to make.

Basic vanilla sponge

Removed from silicon baking mould.

I used a mini cutter to give a straighter edge to the base

Like so

And trimmed with a knife.

Giving a more toadstool look. In the end I think I gave up as these were so small you couldn't really tell, but in a muffin size I would recommend trimming. Or you could fill your moulds a little more so the mixture naturally overflows in the cooking process.

Add some bright red buttercream icing and some mini marshmallows, et voila!

I also made some sushi bites with nori cuttings.

I was quite proud of my Tinkerbells, what do you think? I think the hardest part was searching for the perfect image to cut.

I think this was my favourite. Adapted from this gorgeous photo.

The rice bites were made using this set of rice moulds.

This was regular rice cooked so it was a little stickier than usual. Some of these bites were plain, others were filled with pre-marinated teriyaki chicken. I love having a skewer or two on hand, they are the perfect size for a few sushi rolls.

Some peas helped to complete Gruff.

Being that it was a double movie premier (and I've always wanted to try) I also made some high-heel cakes.

Mini patty cake/cup cakes with buttercream icing then decorated with a wafer biscuit and a Rondoletti stick held in place with a little more icing.

So simple!

For the Gruff inspired ones I used some black chocolate melts with chocolate icing and topped each with a green M&M. I also used two toned wafer fingers for the heel.

I think my melts were heat affected and they didn't really melt properly making piping them quite interesting. I still think they looked cute though!

I failed miserably at these sunflower balls but still love them. I used a cake pop mould for the yellow chocolate (again heat affected I think - the joys of living in central Queensland. Good thing I had some coconut oil on hand). The truffles are TimTam cheesecake balls rolled in chocolate sprinkles. You can see the Pinspiration for them here.

I was so happy with how my little TinkerBell slippers turned out! And just 3 ingredients! Well, I made the coconut balls with condensed milk & desiccated coconut, but you could quite easily use store bought. 

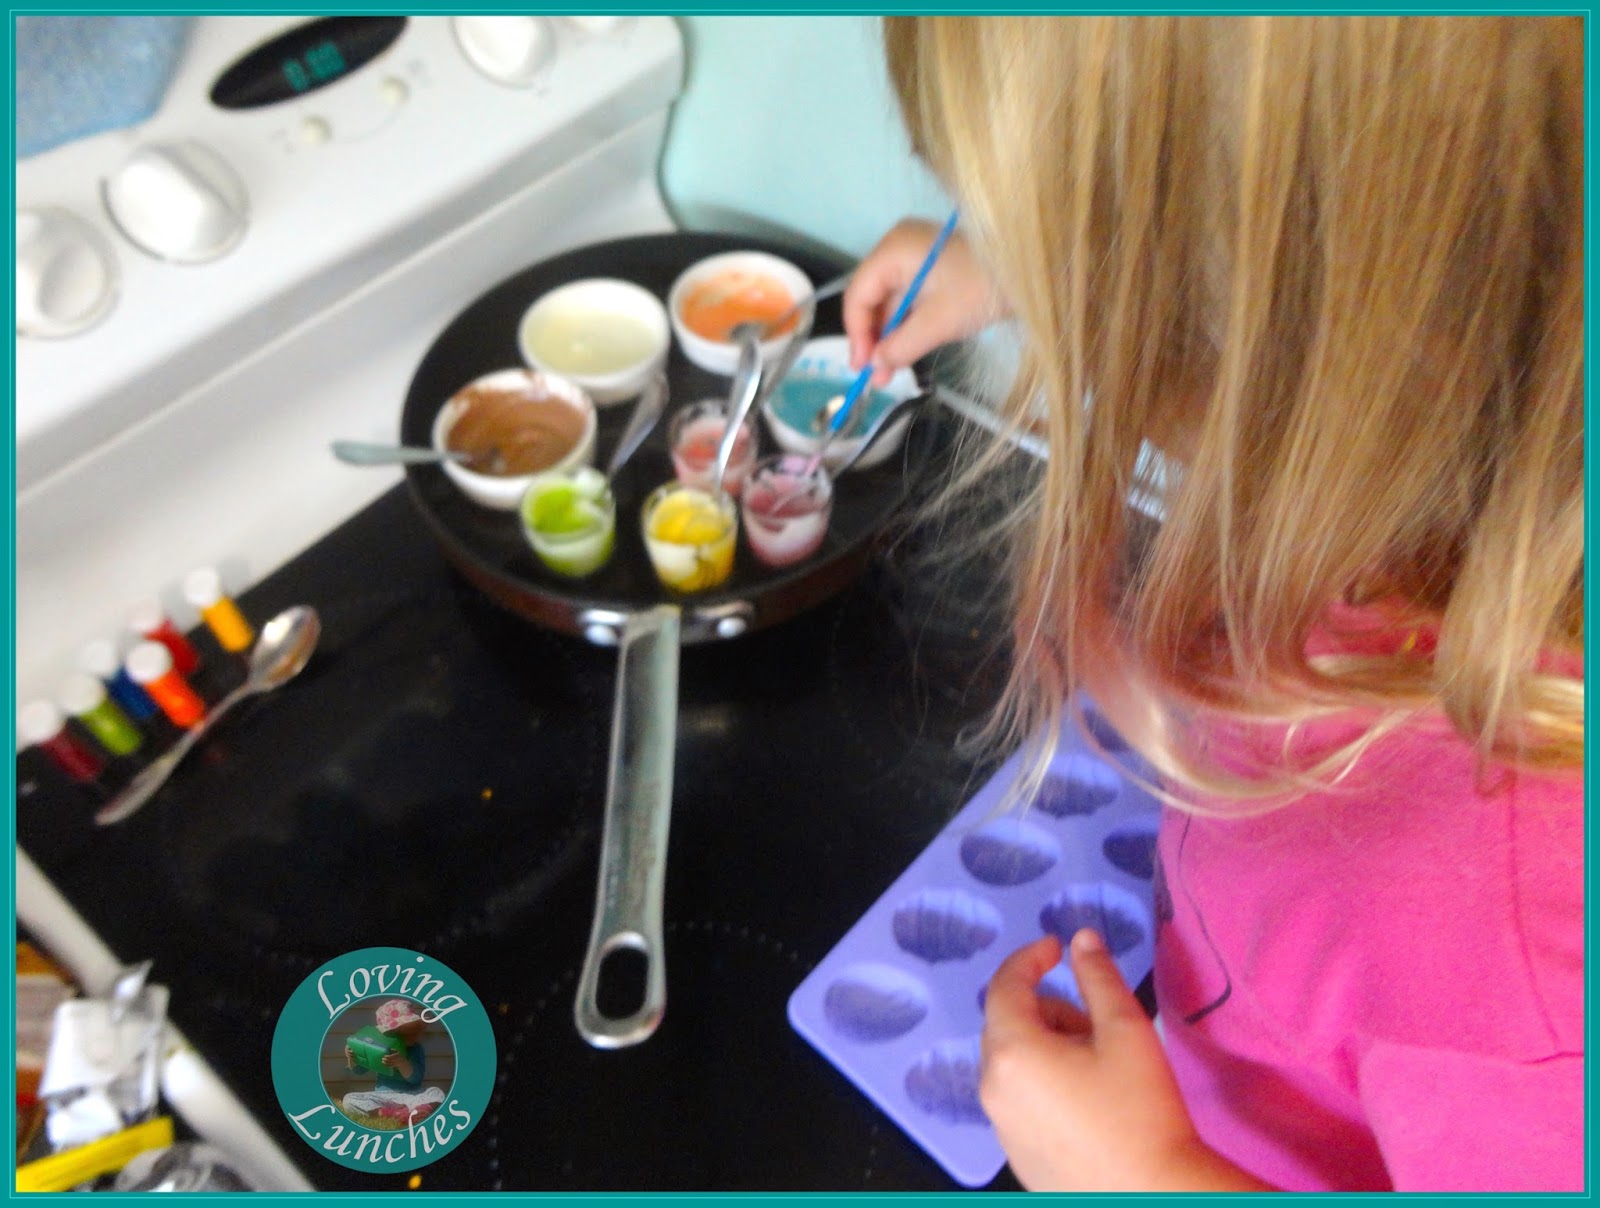
And Miss M had a great time helping colour the biscuits.

And using a little condensed milk to attach the coconut bites.

I can't remember now why we couldn't make it to the movies that day, but you can see some of the spread in this post from the Club.

Details of my tools & toys can be found on this page.

~J

Disclosure: This is not a sponsored post. This post was written for Loving Lunches. No product was received for this post. All opinions expressed are my own, based on my personal experience with the product. This post may contain affiliate links.

Wednesday, 8 April 2015

Home Made Easter Chocolates

I have many fond memories of moulding chocolates growing up and I thoroughly enjoyed making them with Miss M last year so we decided to do it all again this year!

I might need to invest in a bigger frypan or smaller ramekins so we can create even more colours next year!


Testing if the big ones are ready. . .

Woohoo! They are!

I actually really liked the rainbow eggs and am kicking myself I didn't get a photo of them cut open. All the more reason to make them again :-)

More colours.

Honey 'helping' clean up after.

I think my favourite were the pastel rainbow ones we made at the end of the session with all the left over bits of chocolate. Note to self, use the compound chocolate for this method - the real stuff didn't want to set in the fridge ;-p.

Details of my tools & toys can be found on this page.

~J

Disclosure: This is not a sponsored post. This post was written for Loving Lunches. No product was received for this post. All opinions expressed are my own, based on my personal experience with the product. This post may contain affiliate links.

Monday, 16 March 2015

Chicken Avocado Filo Parcels

I mentioned the other day about the Chicken Filo parcels I'd made so thought I'd share. This was the end result. I forgot to take a happy snap of them opened, so you'll have to trust me that they were cooked beautifully and tasted scrumptious!
With a little help from the munchkins we flattened some chicken thighs and rolled them with some cubed cheddar and a slice of avocado inside. I also made some with pizza sauce instead of the avocado and sprinkled a little parmesan on top so I knew which ones they were. Turns out Miss M still won't go for avocado, but at least she tasted it.

Each thigh was wrapped in 2 sheets of filo, generously spread with melted butter before being baked at 180 degrees for around 40 minutes.

I've been a little slack on the #52NewFoods front. . . how are you tracking?

Details of my tools & toys can be found on this page.

~J

Disclosure: This is not a sponsored post. This post was written for Loving Lunches & 52 New Foods Challenge who generously provided me with a copy of their book. All opinions expressed are my own, based on my personal experience with the product. This post may contain affiliate links.
Pin It button on image hover