Showing posts with label Weaning. Show all posts

Monday, 13 October 2014

Repurposed Formula Dispenser Snacks

 I love picking up hints & tips from all sorts of sources. This one came from the Mothers Group I met when Honey was born. At one of our get togethers I noticed one mum using a formula dispenser as a snack container - why didn't I think of that?!? I love that the ones I found are roughly the same size as a drink bottle so they fit rather well into the pockets on the side of the girls' backpacks. Handy when looking at travelling :-)

This trial run outing Honey had some powdered milk (for just in case), a sandwich, strawberries and Milk Arrowroots.
Miss M has a slightly different container with deeper sections. She also has strawberries and Milk Arrowroots. Her third section has some limited edition Australian shaped Shapes.


Details of my tools & toys can be found on this page.

~J

Disclosure: This is not a sponsored post. This post was written for Loving Lunches. No product was received for this post. All opinions expressed are my own, based on my personal experience with the product.

Friday, 29 August 2014

Divided Container

Another Flashback Friday. I can't remember when I took the photos of this snack box, but I think it was this year.

This one I remember, and not just because of the giant Take & Toss container of whipped cream :-)
This was my 'take a plate' for Mothers' Group last year. Picklets with a selection of jams & butter. I love going to take-a-plate gatherings on Monday because it generally means I make a giant batch of pancakes for breakfast Sunday, ensuring there's enough batter to make picklets. And then I have the excuse to whip some fresh cream too!

Back to the box! This one comes with some cute silicon cups which I tend not to use, but if you were wanting to super-small your serve you quite easily could. 

This box had a sliced cheese stick, jam sandwich cut with a Cube It and a dried fruit medley. I bought the round ones in the hope I could convince Miss M they were lollies (like Jubes) but she wouldn't buy it. Or eat them :-(

 These photos are from a little more recently (since my computer went kaput). Apologies they don't look as pretty.
 Miss M working on her knife skills helping me pack Honey a snack box for the day. I normally pack lunches for Miss M at night, but more often than not I forget about packing Honey and/or I a snack box if we need it until the morning.
Grapes, cheese Cube-It sandwich and strawberries.

Details of my tools & toys can be found on this page.

~J

Disclosure: This is not a sponsored post. This post was written for Loving Lunches. No product was received for this post. All opinions expressed are my own, based on my personal experience with the product.

Friday, 15 August 2014

Happy Soup

A bonus post for you this week - Happy Soup! It's really quite simple. . .

Take some sad vegetables, add a little water or your favourite stock, and any herbs/spices that take your fancy. Toss it all in your Kambrook Soup Simple and select your favourite soup style. I chose 'chunky' so I had the option to blend later, but I quite liked the texture of each of the vegetables as they were.


Honey and I had this for lunch twice this week. A great way to add a few extra vegetables to your diet.

What's your favourite vegetable soup?


Would you like to win a Kambrook Soup Simple for yourself? Details in this previous post.

Details of my tools & toys can be found on this page.

~J

Disclosure: This is not a sponsored post. This post was written for Loving Lunches. No product was received for this post. All opinions expressed are my own, based on my personal experience with the product.

Thursday, 14 August 2014

Soup Maker Baby Food Fruit Puree

Another thing I've been using our Kambrook Soup Simple for is batch making fruit purees.

Simply pop your chosen fruit (I've been making apple & pear of late) into the Soup Simple with a little water (otherwise it will burn - speaking from experience) and select 'smooth'.


If for some reason it doesn't finish the cycle (this time the fruit collapsed so the machine read it as insufficient contents to blitz) you can always trick the machine into blending by tilting it a little. Again this is against manufacturer's recommendations and I've only done it the once when I was feeling lazy :-)

I like to freeze in an ice cube tray before storing in a zip lock bag. I also like to keep a few Sinchies food pouches of puree in the freezer too. I get two breakfasts out of one 80mL pouch (when combined with porridge).


Would you like to win a Kambrook Soup Simple for yourself? Details in this previous post.

Details of my tools & toys can be found on this page.

~J

Disclosure: This is not a sponsored post. This post was written for Loving Lunches. No product was received for this post. All opinions expressed are my own, based on my personal experience with the product.

Wednesday, 6 August 2014

Soup Maker Pancake Mix

I mentioned yesterday that I've made pancake batter in our Kambrook Soup Simple. It really couldn't be simpler. . .
NB You should always follow the manufacturer's instructions -not like me.

I popped all my ingredients into the measuring jug and then placed the jug, minus the handle into the soup maker.


*VERY IMPORTANT* that you select the 'blend' function, or you will end up with melted plastic and nobody likes that.


You can see that it didn't quite get all the sides, but for a 2 minute whiz I think it did a great job!
It's the smoothest pancake batter I've made for years!


Would you like to win a Kambrook Soup Simple for yourself? Details in this previous post.

Details of my tools & toys can be found on this page.

~J

Disclosure: This is not a sponsored post. This post was written for Loving Lunches. No product was received for this post. All opinions expressed are my own, based on my personal experience with the product.

Tuesday, 5 August 2014

Souper Review and Giveaway

If you have been following on Instagram you will have noticed I've been having a great time playing with my Kambrook Soup Simple Soup Maker. I've been making all sorts of soups, but you know me and repurposing - I've had a go at baby food, smoothies, mousse, cake batter, pancake batter and even jam! Today being my 'blogiversary' (two years, really?) the lovely folks at Kambrook decided to send a gift to you! Details for this Soup Simple giveaway at the end of this review.


You may be thinking, but soup's not that difficult to make. Do you really need a machine to do it for you? Well, when you are easily sidetracked (was that a squirrel . . . ) or if you get called away from the kitchen (cue crying baby) this little invention can be a lifesaver. Yes I have popped my ingredients in, hit the button and come back not 20 minutes later as planned, but almost a full hour, and still had a nice hot soup to enjoy - not a burnt thick charred mass of goo. In fact, the only time I've had issues with burning was the second time I used the unit thinking 'it's really only heating & blending - surely custard would work'.

Well, custard powder, sugar and milk produce . . .

this result. . . 

Which does get better after soaking.

And better again after scrubbing with a scourer and dishwashing liquid. But, like the instruction book says, Gumption is the go! It worked a treat :-) I also learned that the unit will switch off if it gets too hot, making you think that perhaps you forgot to press the start button. This is why I should read instructions.

I won't overwhelm you with all the recipes I've been posting using this one pot wonder. Instead you can see them all here. One recipe I haven't posted yet (because I haven't refined it enough) is Strawberry Jam. And being that each year I've started taking a strawberry photo with my girls (see last year's edition here), I thought this a great one to share.

Failures are good to share, right?

My first attempt I used 3 punnets of strawberries (hulled), a good squeeze of lemon juice, and 1 cup of water.

All tossed in the soup maker & set to 'Smooth'. Worried I might end up with sticky jam burnt to the bottom of my Soup Simple I stuck around. I also disregarded advice about fruit to sugar to water ratios when making jam and added zero sugar and extra water. About 2 minutes away from finishing the 21 minute 'Smooth' cycle, the unit beeped - my heart dropped. . .

But it wasn't a burning 'beep'. Instead it was a 'contents too low' beep. *Phew* No burnt residue, but also no jam. Instead I got some lovely Strawberry Sauce. Upon tasting I decided to stir in about half a cup of castor sugar which quickly dissolved into the still hot syrup.

My next attempt I used 4 punnets of strawberries, 1/4 cup sugar dissolved into 1/2 cup water. But I forgot the lemon juice. I'm not sure if that is why my second batch also need up as soup rather than jam and I had run out of enough strawberries to find out.

Right about now is where I would love to share the many things I've been making with my strawberry sauce, only my computer has had a hissy fit and it would seem I've lost quite a bit of data :-( So instead I will have to refer you to my Instagram feed. At least I have some accessible record of these delicious creations!


Loving a repurpose… @kambrookau #soupsimple strawberry sauce in our yoghurt park lunches today. In our @easylunchboxes Spoons from @little_bentoLoving my failed @kambrookau #soupsimple strawberry jam as a topping tonight… what is your Saturday night shaping up like?

Loving an experiment… strawberry sauce from our @kambrookau #soupsimpleLoving semi success… @kambrookau #soupsimple strawberry sauce roll ups. A little under done, but still nice


So. . . what do I think of the Kambrook Soup Simple?

Loving:
  • Set and forget cooking
  • Multi-function (smooth soup, chunky soup, blend, and pulse)
  • Concealed element for a smooth internal wall and base
  • Pour your soup straight from the Soup Simple
  • Who doesn't love soup? 

Loving a little less, but liveable:

  • It's not the easiest unit to clean. You can't pop it in the dishwasher (not that I have one). The main unit can't be submerged in water, which is what I naturally felt like doing. The top piece with the blades can also be tricky to get in around, although the provided brush does help.
  • If you only want to make a single serve smoothie, this unit is not for you. The unit needs a minimum of 1300mL to operate, and even with Miss M, Honey and myself tackling a batch of smoothies, sometimes we struggle to finish. Mind you, there's nothing saying you couldn't save some for later or even freeze some of your leftovers.
  • I would love a cover for the unit and a 'reheat' function so you could pop the whole lot in the fridge in-between servings, but then again there's never that much room in my fridge :-)
  • I would also like a window or clear canister to see how the cooking/blending is coming along, but I'm just a sticky beak
Overall:
I am very happy to have this little helper in my kitchen, and as Honey grows and I start to think about shedding those 'bonus-baby-bulges' this will certainly come in handy. I tend to use it more for making grown up lunches (Mr Loving & I) and the size is good for us there. Three adult serves generally speaking. One lunch for the pair of us and one work 'lunch' for me. Occasionally I will stretch it out to four serves, it just depends on how hungry we are at the time :-) Honey will have some chunky soup but isn't terribly fond of the smooth unless it is served to her in a Sinchies food pouch. Miss M won't have a bar of it - even with crouton sticks. All the more for me!

So are you sold yet? Would you like a Kambrook Soup Simple for yourself? Simply follow the instructions on the Rafflecopter form below - Good Luck!
  • As per Terms & Conditions you must complete all three mandatory entries to be eligible to win. It is highly recommended that you enter the giveaway with the same email address/ID you follow with, otherwise your entry can be difficult to verify.
  • Open to Australian residents aged 18 & over, excluding NSW
  • Full Terms & Conditions can be found here

a Rafflecopter giveaway

Disclosure: This is not a sponsored post and no monetary compensation was provided nor offered. This post was written for Loving Lunches and Kambrook Australia who generously provided me with a sample for review and the prize/s for this competition. All opinions expressed are my own, based on my personal experience with the product.

Wednesday, 18 June 2014

Sweet Potato & Pear Soup


If you've been following on Instagram you will have no doubt noticed the latest addition to my kitchen - the Kambrook Soup Simple. There is a full review (& giveaway - shh!) on it's way, but in the mean time, here's one of my favourite soups that I've been meaning to share for a while now.

This is the original version I've been making for a few years, and while it works just fine. . .

. . . as you can see. I now have a much easier way of making it!


Loving flu brain… note to self. When making sweet potato &pear soup- don't forget the pear ☺️ with @kambrookau Soup Simple
Pop all the ingredients (25 g butter, 1 onion, 2 firm pears, 750g sweet potato, 2 cloves of garlic, 750ml chicken stock) in the Kambrook Soup Simple, press a few buttons. . . 


Loving a set & forget vege fix… sweet potato & pear soup in my new @kambrookau Soup Simple. Yum!!
. . . and come back 20-odd minutes later to a beautiful soup! Yum!

Suitable for freezing, and if you've chosen a salt reduced stock, also perfect for the whole family. We tend to season at the table these days for this reason. Serve as is or with croutons for grown ups, with toast fingers for a toddler, and soak toast, bread or noodles in it for baby. You can also simply thicken with rice cereal, depending on which texture your little one is up to.

Details of my tools & toys can be found on this page.
~J

Disclosure: This is not a sponsored post. This post was written for Loving Lunches. No product was received for this post. All opinions expressed are my own, based on personal experience with the product.

Wednesday, 4 June 2014

Introducing Solids Part Three - Tools of the Trade


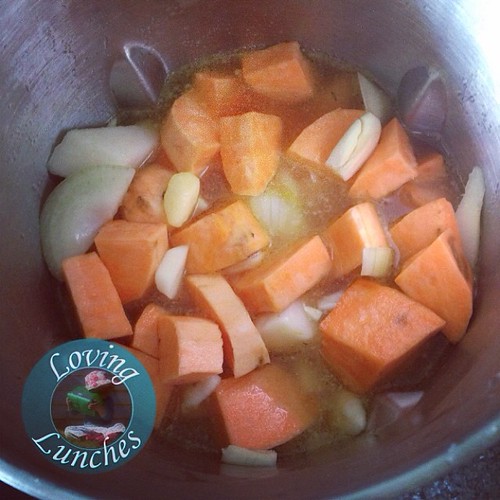
Who would have thought that such a tiny creature would create so much . . . 'stuff'! Recently I've been sharing my thoughts and research about introducing solids as our little Honey makes her way into the wonderful world of food. Here's the links for part one and part two for you.


Of course you don't actually need all this stuff. Admittedly some of it can make life an awful lot easier, but remember that people have been raising babies for quite some time now, and it's not like the cavemen had all the wonders that are the mountain of spoons you seem to accumulate :-)


And seeing as these are the most fun, let's start with the spoons shall we?
Your easily recognisable teaspoons. The one on the left is a kiddies spoon from Ikea, but I notice that style around a lot lately. In the centre is a 'real' baby spoon in that is came from a baby cutlery set. There's nothing wrong with using teaspoons. I just found in the early days when we were both still learning how to do this whole feeding thing that we had a few misjudgements and hard metal on soft gums doesn't really make for happy campers. Also you can fit quite a lot of food on a teaspoon, and trying to fit that into a tiny baby mouth does correspond to the whole feeding an octopus swinging from the ceiling comparison you've heard about.

Also stock standard spoons, this time disposable, picked up from here there & everywhere and always floating in the bottom of my handbag these days. While they are handy to have . . . on hand, they can be a little sharp for soft little gums. Good if you're in a bind, but not to be relied on. My favourite is the mini gelato tasting spoon in the centre - and not just because it meant I got to eat gelato :-)

Ahh. . .baby spoons! With Miss M I only had the Nuby ones on the left. They have a lovely long handle and small but deep head. They are thick and soft to the touch. I used them to start with Honey too but we've moved on since I now had a few more options. They also change colour with heat, but they are somewhat discoloured now so I'm not sure how reliable that function currently is :-)
The pink/purple spoon is from Tommee Tippee and while we use it on occasion it isn't one of my favourites. I find the head too long and the handle slightly awkward. No idea how that works, but that how it feels. Perhaps it will come into it's own when Honey starts to feed herself from the spoon.
In the centre is a Heinz number which is really quite good. The head tapers from relatively thick at the base to fairly thin at the nose, which means you can really scrape down the side of your bowl with some ease. I quite like this one!
The orange is one of a pack of Take & Toss spoons that came in a gift basket when Honey arrived. These are now my go to spoons. Partly because there are so many of them, and partly because they are a decent design. They are hard so I wasn't comfortable using them when Honey was smaller, but she's almost 10 months old now (where has the time gone?!?!?) and she does quite well with them.
The little red one is from Heinz and is designed to complement food pouches. I must admit I'm not a fan as it loads the food through a *very* small hole at the back of the spoon and I prefer to feed off the front of the spoon - does that make sense?

This lot is the not necessarily spoon collection. 
There were two Sinchies bags there but Honey stole one just as I took the photo. These food pouches are great. You can read my original review here. As an added testament I liked them so much I bought more for this school year. For babies though, they open a world of self feeding for purees or semi-liquid foods (think soups and yoghurts). The spout is wide enough that you can suck out smoothies, but small enough that even if it is squeezed, you're not going to end up with half the mess you would had it been a bowl knocked over. Not to mention these guys are clear so you can easily see how much is left, or whether they're in need of a clean in the corners. I know that moving through the textures is a big thing with introducing solids, but yoghurt pretty well only comes in one texture, and this way baby can self feed, giving you a hand free to feed yourself!
The food net at the top is a Tommee Tippee that I bought to replace our old Munchkin Fresh Food Feeder. I didn't use it much with Miss M as the net was hard to clean and always smelt odd. The new Tommee Tippee one comes with two spare nets and a cover! So much better. I've used it a bit with Honey. Early on for stuffing full of whatever we were eating (mostly veg), this comes in particularly handy if you are out & about or travelling. You can generally pick up a roast meal most places and it's so easy to pop a few veges in the feeder for them. I've also used it as an 'ice block' holder for those really hot days we had over summer. They are a great way to introduce foods that would normally require a bit of work (like meat), but they don't allow baby to explore the textures too much. If you're considering one of these do go for one with replaceable nets and a cover. Don't leave it too late as there is a limited time they will last once teeth come in.

Oh, and they all make really good play things when Mum's not looking too :-)

Bottles and sippies and straw cups - oh my!

This is just a selection of our hoard. My girls have seemed to go for the straw cups rather than spouts.  I must admit I'm liking our Avent Grown Up Cup at the moment, but it can get a little messy so it's our dinner time cup. You can just see it on the top right - the red lid. I love that the lid keeps the flies off during the day and it also encourages that normal drinking action without spilling too much. I'm not sure I'd be comfortable with it floating around in my handbag though.
Our Brother Max trainer cup has been a bit of a let down to date. The handles have been great, but Honey just hasn't gone for the teat. Perhaps when we update to the cup lip we'll be right. . .perhaps :-) It's the one with the funky looking handles towards the bottom left.
The white zippy with the blue handles along the bottom is an old style Avent bottle. The teat is just to the right. I love that you could easily upgrade your base bottle with this style. I'm not sure if that is still available with the new style released last year. You can see the new style just above the Brother Max. 
The only other major thing to note is the different types of straw you can get. I left the lid of Miss M's orange drink bottle on the top left down, but that one (I think it may be Nuby but the name has worn off) has a thick straw top that requires bub to bite down a little to get any water out. You can get them with a more regular shaped straw which are great for fluid flow, but it can come out a little fast and cause baby to splutter somewhat. Unfortunately it's a trial & error thing, but I prefer the regular style.

Containers! You will want to have something to store baby's food in. Whether it be purees you are prepping ahead and freezing in an ice cube tray (once frozen you can transfer to a ziplock bag), or finger food you are saving from your meal to serve the next day. Here's some of what I've been using.
Ice cube tray - perfect for freezing single serves before storing in a ziplock bag. 
Sinchies pouch - I've already told you how much I love these little guys :-)
Tupperware - because I already had a huge stash anyway :-) I didn't pull out my midgets & smidgets - they are perfect 'shot glass' size but not part of the regular Australian range. I'd recommend checking out eBay if you're interested.
That purple one is a Twistix icy-pole mould which I've used for freezing yoghurts, smoothies, juice, all sorts! Honey has stolen some of my frozen yoghurt & mango from one and I was quite surprised at ow well she handled it. She wouldn't stop eating it though so her poor little lips were a bit red after from the cold. Lesson learned - hide frozen yummies from the baby unless you want to share!
I love love love my Take & Toss containers. I bought a six pack of the large when Miss M was starting to progress through to finger foods. They are the right size to hold a few serves of veg cut into good 'chip' sizes. When she grew up a bit I bought the small snack containers and the tall cups. I love that the lids on those two are interchangeable. I can serve a small drink  and a large snack, happy days!

Plates!!
For the early days I could't go past my little gelato and airline bowls. Perfect for the small amount you need, reheatable, and drop safe! Of course you could use some of the Take & Toss snack containers because they come with lids too, but anything uneaten really should be tossed for safety reasons.
I've only just started using a divided plate. It comes in handy to remind me I don't need to fill the whole plate. It's also handy to keep partially eaten bits separate from the 'good' food. Only problem with this one is it's melamine which is not microwave safe.
The Tupperware handled bowl there is though. It also has a lid and holds a decent amount. Miss M used to eat a full adult serve of oats for breakfast, but wasn't too keen on waiting for them to cool down, so I took to preparing them the night before & letting them 'soak' overnight. In the morning I would just give them a little zap to warm them through a touch.
Those flat plates you can see (yellow & blue) are from Ikea and are microwave safe too. Great size for sandwiches & because they are drop safe we use them constantly! And not just for the little ones. I've been known to heat a pie (or two) on them for my own lunch form time to time.
That leaves our Bunnykins bowl. This is a brilliant baby bowl as it's quite heavy (harder to knock over - not impossible, but harder) and you can pop it in the microwave (perfect for heating leftovers). It is breakable though, which is why I invested in one of these guys.

I've never been able to get it to stick to plastic plates well, but our Bunnykins it works famously with.

Ok, this one isn't really food related, but while we're in the kitchen I thought I'd share this tip from Mothers Group - use link toys as cupboard child-proofing. They can still pull the doors so fingers can get caught and if you have mountains stacked in there (like Tupperware) some can still fall out, but it can be a deterrent.

Wow! Another post longer than I'd planned. Let's see how we go for next week & line up a 'yeah, but *how*' post. Please feel free to leave a comment below or on 
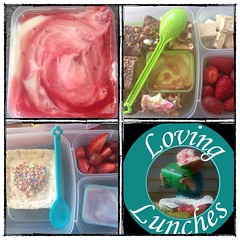
Facebook. I love hearing your feedback and questions! Let me leave you with a few happy snaps :-)


Have you entered our latest giveaway? Details in this post.


Details of my tools & toys can be found on this page.
~J

Disclosure: This is not a sponsored post. This post was written for Loving Lunches. No product was received for this post. All opinions expressed are my own, based on personal experience with the product.
Pin It button on image hover