Showing posts with label Tools & Toys. Show all posts

Monday, 1 June 2015

Japanese Chicken Curry and Baran

Last week I shared my Slow Cooker Japanese Curry recipe with you. Perhaps it's me craving it again, or perhaps it's the part of me remembering I will be returning to work in a few weeks that I remembered this lunch I'd packed fro myself some time ago.


I used some colourful rainbow baran to separate my rice and curry. It's not something I've done often, but I've learned that this is not only a pretty element, it can also act as an antibacterial in some cases! Now I'm beginning to wonder how close I've put myself to food poisoning in the past - eek!
This lovely little lunch was a perfect size for my short break, and I love that both it and the baran are microwavable! (not the lid though)


Details of my tools & toys can be found on this page.

~J

Disclosure: This is not a sponsored post. This post was written for Loving Lunches. No product was received for this post. All opinions expressed are my own, based on my personal experience with the product. This post may contain affiliate links.

Tuesday, 9 December 2014

Teachers Cannot Live By Apples Alone. . .

They need lunch too!

Thank you to Biting the Hand that Feeds You for this fantastic idea! Check out the gorgeous lunches she made for their Teacher Appreciation Day in this post.
My personal shopper did a Daiso run for me and found a fantastic haul.

Each teacher received a cooler bag , tiered lunchbox, dressing bottle, two ongiri boxes, mini cutlery, drink bottle and an ice pack. There were also a few picks included in their lunches.

And different colours so there was no confusion.

Now, on to lunch! I made colour co-ordinated 'menus' for each teacher. They each had a different juice and there was also dietary considerations. Our menu also doubled as a card.

Miss M enjoyed helping to make the salad and decorating with the rainbow carrots that have just come back into our major grocer.

Honey enjoyed the photo shoot that followed
;-D.

Three lovely salads, all in a row.
I cheated and bought some bags of salad leaves and added the decorative carrots and apple (dipped in apple juice before drying on paper towel). There are some offcuts hidden throughout the salad too.

Ranch dressing in the bottle, with Christmas-y apples and rotisserie chicken.

The sweet snack boxes contained apple and raspberry cupcake or cake pop, depending on dietary requirements. Decorated with pretzels and lollies. This time I used fruit salad jellies, you can see the mint leaves I've used in the past in this previous post. There's also an apple pastry rose each (see my first attempt here) and a mint ball. The ones covered in crushed M&Ms are my Naughty Mint Balls (aka reindeer poop) while the coconut rolled one is a Nice Mint Ball from The Kids Menu.

The savoury snack boxes contained my first attempt at apple crisps. They didn't really turn out as crispy as I would have liked, Chips - yes, crisps - no.
And in the morning I added a Sweet Potato, Quinoa, Apple Stuffing ball to each box. You will have to come back tomorrow for the recipe :-).

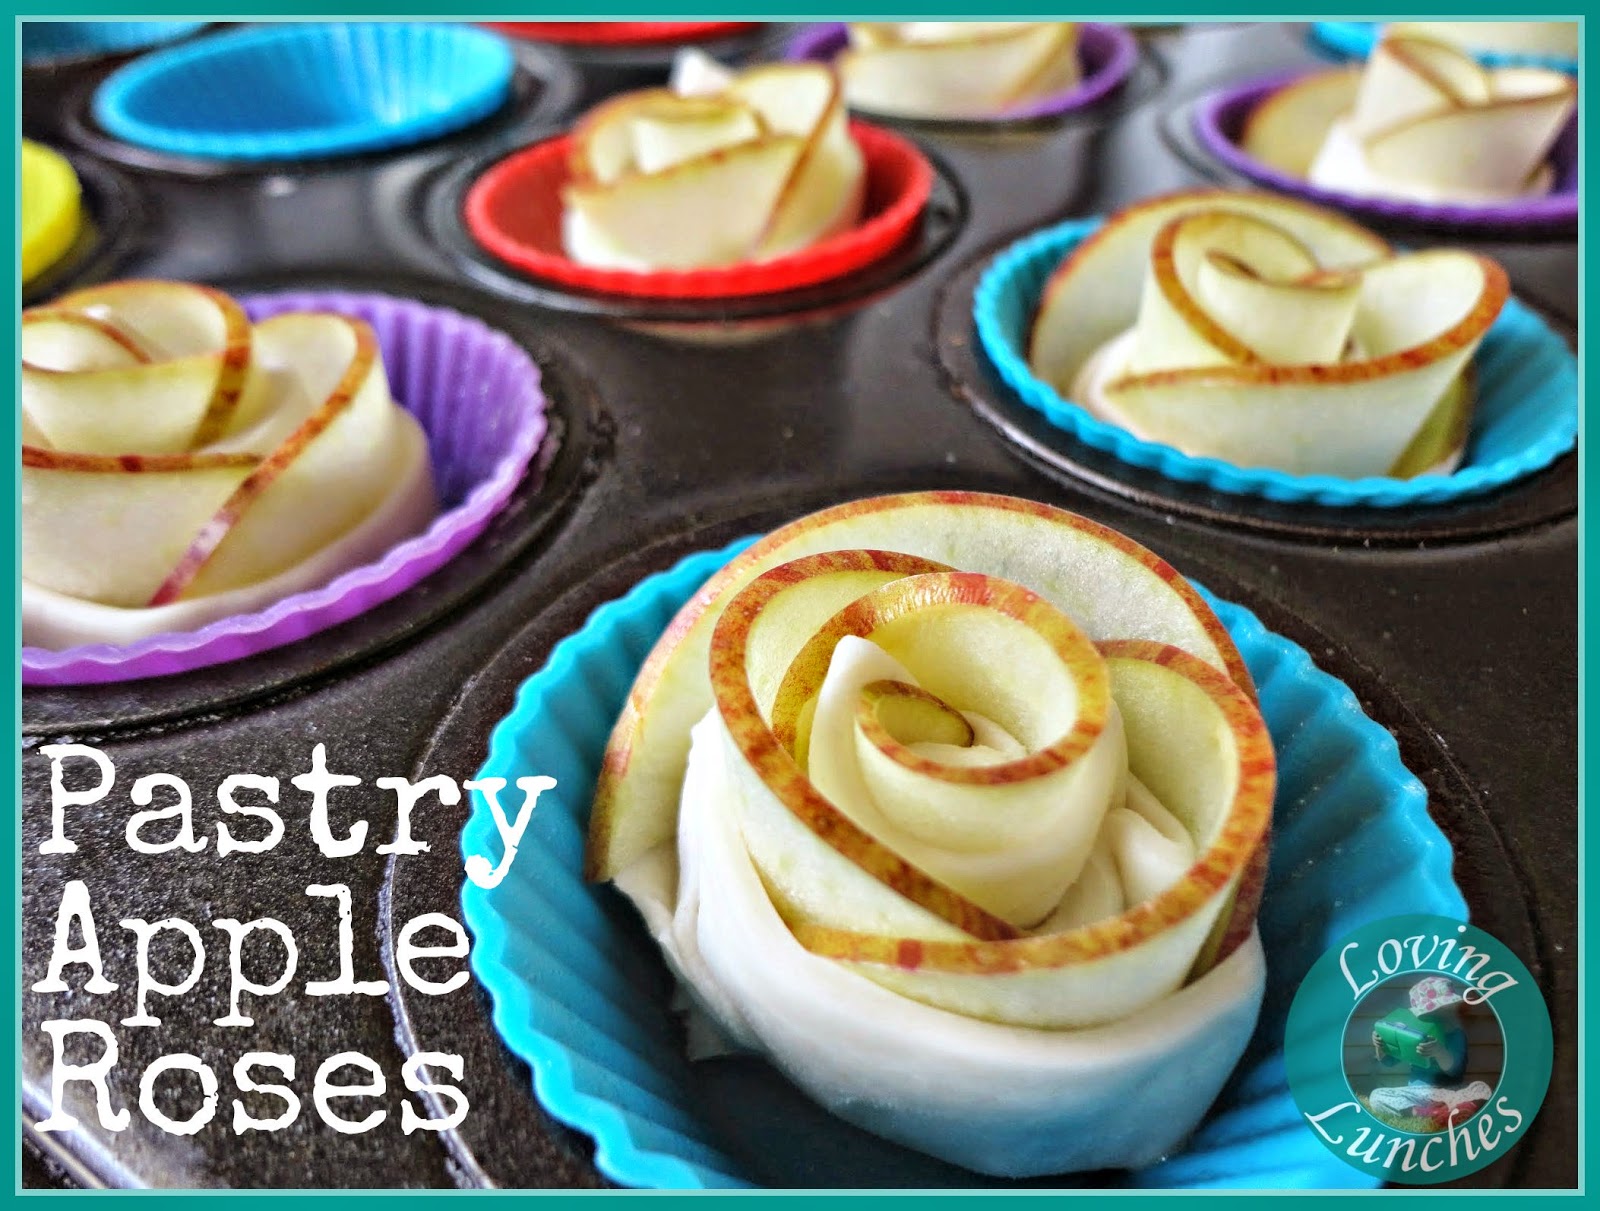
These little guys though - finely slice your apple and dip in apple juice. Dry with paper towel. Lay onto a strip of puff pastry so that the skin of the apple is facing out and the pieces overlap, resembling a wave. Fold up the pastry to enclose the bottom half of the strip before rolling tightly. I sat these in a muffin pan to help hold the shape which worked well. Bake at 180 degrees until the pastry is golden.

And if you follow on Instagram you would already know that I had to match the juices to the lunch boxes :-). I admit that I didn't blend these myself. Giving as a gift I didn't want to risk having the flavours wrong. 'Miss Pink' had apple & cranberry. 'Miss Green' had apple, orange, kiwi and spirulina juice. 'Mrs Orange' had carrot, apple & orange juice.


All packed and ready to go. The bags held the lunch and snack boxes. The ice pack and drink bottles were separate.

What did you give your teachers this year?


Details of my tools & toys can be found on this page.

~J

Disclosure: This is not a sponsored post. This post was written for Loving Lunches. No product was received for this post. All opinions expressed are my own, based on my personal experience with the product. This post may contain affiliate links.

Friday, 24 October 2014

Vegetable Cutter Comparison

I have a little problem with Flashback Friday this week. . . I can't remember the result of my experiment! I know this was last year in the lead up to Christmas and I only thought of these photos after finding some of these cuttings in the back of the freezer the other day (perfect for pizza toppings by the way). I do remember I used a red capsicum, and have since learned thanks to Wendolonia that it is much easier to use a cutter once you have *peeled the capsicum*! Of course, why didn't I think of that!
These little sausage deco cutters worked but I'm sure it's these that ended up giving me my first bento injury - death by paper cut!
Vegetable cutters - designed to do the work.
A selection from my Create-A-Shape pack. My go to, favourite pack.
The Luv-It by FunBites.
And some pretty deco cutters.

You can see some of the edges are a little ragged across the board, but if I'd known about that peeling trick things might have turned out differently. Live and learn!


Details of my tools & toys can be found on this page.

~J

Disclosure: This is not a sponsored post. This post was written for Loving Lunches. No product was received for this post. All opinions expressed are my own, based on my personal experience with the product. This post may contain affiliate links.

Wednesday, 22 October 2014

Ladybug Lunchbox

Just a quickie today :-) I bought this gorgeous little lunchbox last  year and have used it a few times, mostly for day outings for Miss M (she is my little M-Bug). 

It's easy to take a food pouch with yoghurt, toss a fruit salad in the base. . . 


. . . and trim a sandwich to fit in the top. Spreading some strawberry jam on top and adding a few sultanas and a cheese stick (down the back and for the eyes) turns it into a real lady bug.


I like to use a little baking paper under the sandwich to help lift it out. Simple!

Details of my tools & toys can be found on this page.

~J

Disclosure: This is not a sponsored post. This post was written for Loving Lunches. No product was received for this post. All opinions expressed are my own, based on my personal experience with the product. This post may contain affiliate links.

Friday, 3 October 2014

Sushi

Wow, this is a flashback! My heart does skip a beat when I find photos of lunches made in our old kitchen. *sigh*.
These were made for a take a plate party with some friends and I thought it was the perfect opportunity to try out some cute cutters I'd gotten from Bento USA.
I cheated & used our Sush-ezi for the teriyaki chicken, avocado & carrot sushi.
Oh how I miss that giant bench!
I do love the little mould that comes with the cutter set. Just perfect!
And I made the kids ones with no fillings.
As you can see the cheese cracked quite badly.
And there was a lot of off-cuts.
Back to rolling the grown up sushi.
One day I will get the perfect centred sushi :-)


Details of my tools & toys can be found on this page.

~J

Disclosure: This is not a sponsored post. This post was written for Loving Lunches. No product was received for this post. All opinions expressed are my own, based on my personal experience with the product.

Monday, 22 September 2014

Daiso Goodies

Are you enjoying your holidays? We're having a great time, and although I'd love to say I got to go shopping for these goodies myself, alas I had to send my personal shopper (thanks Sis!)
Some cutlery for next year (Miss M will have to take her own cutlery to prep)

More cutlery for next year.

Gorgeous little heart picks - I'm thinking Valentine's already!

And a little music to brighten your day :-)

I actually requested these thinking I would use them for Honey's Teddy Bear Picnic birthday party, but had too many ideas, and not enough time :-)

Oh the wonders of a growing collection!

Details of my tools & toys can be found on this page.

~J

Disclosure: This is not a sponsored post. This post was written for Loving Lunches. No product was received for this post. All opinions expressed are my own, based on my personal experience with the product.

Monday, 15 September 2014

Porcupine Helmet Sandwich

A what now?

If you're familiar with Magpies and spring, fair chances are you're also familiar with the swooping and diving and running for cover that comes with them. We discovered on our walk/scoot home from Kindy recently that we have quite a vindictive Maggie living along the way. Poor Miss M got the fright of her life that first swoop!


That afternoon Mr Loving helped us attach some zip ties to her helmet (as is the fashion during swooping season) and her 'porcupine hat' came to be.

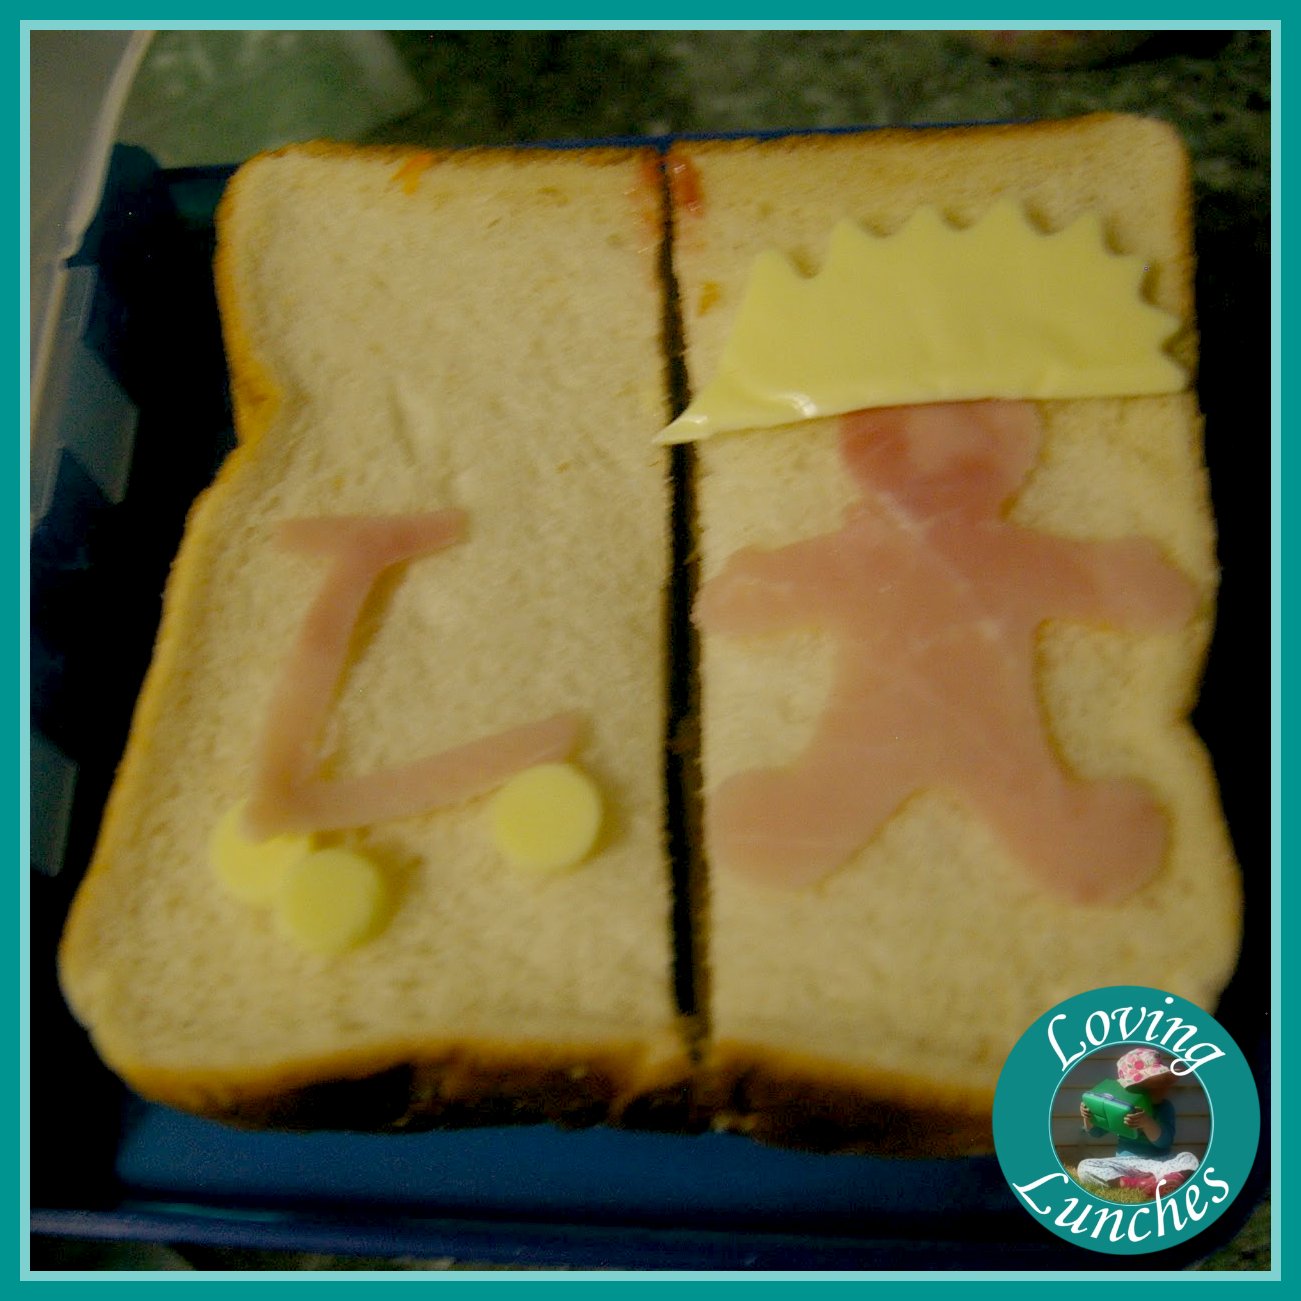
Not long after I was lucky enough to win the international prize for Eclectic Lamb's 3 year Blogiversary giveaway! Checking out my new toys, and discussing the what each of the cookie cutters could be, Miss M said the hedgehog looked like a porcupine 'Like my porcupine hat!'. So I knew I had to make her a lunch with it :-)
Apparently I got the scooter wrong though. It's supposed to have two wheels at the front, not just one. So Miss M helped me to get it right the next night. She's still not satisfied with her image 'jumping' instead of scooting, but she let it slip this time, tee hee hee.


Details of my tools & toys can be found on this page.

~J

Disclosure: This is not a sponsored post. This post was written for Loving Lunches. No product was received for this post. All opinions expressed are my own, based on my personal experience with the product.

Wednesday, 10 September 2014

Bento Storage

The last time I wrote about how I store my bevy of Bento Beauties was back in 2012 in a relatively newly renovated kitchen, You can read that post here. Since then we have moved town and our kitchen size has halved :-( It's taken a little while, but I'm slowly coming to terms with the space I have and how to manage all the wonderful toys tools I've collected over the past few years.

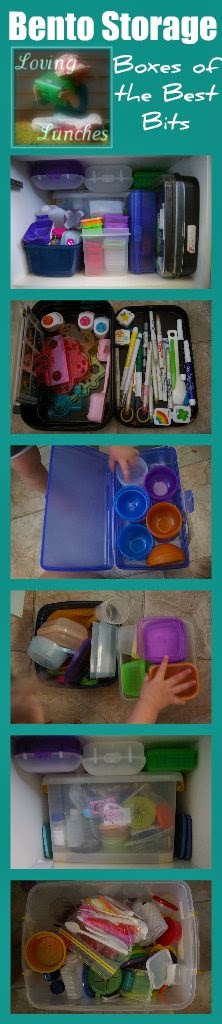
So what is in my cave cupboard of wonders? Quite a bit!


I recently re-arranged after purchasing another of the green Starmaid containers I use for my sandwich cutters. These used to live on the top shelf as they get quite a bit of use, but the three don't quite fit there, so it was a complete switcheroo. The top shelf now holds my box of 'that will be useful one day' and 'it was useful once, it could be again' goodies. Tackling that box is on my list. . .one day :-) It's also where I keep the boxes and containers I use most often, although my Easy LunchBoxes are in my Tupperware cupboard waiting for me to decide where to keep them.

My second shelf holds my sandwich cutters. I do also have a stash of biscuit/cookie cutters in my Tupperware cupboard, again waiting for a more permanent and suitable home. It's also where I keep some of my growing silicon collection, picks, egg moulds and lunch cutlery (which I will have to start sending with Miss M next year). One tip I picked up from this fantastic Pinterest Board by some of my favourite Bento Bloggers & Friends was to use some of my old/not so often used boxes to store some of my goodies in. It was a real light bulb moment! I told you some of those things in my 'useful' box would be useful again! I also learned that it's easier to store your cutter sets in ziplock bags. Why didn't I think of that?

But what about the rest of my boxes? Well. . . .
. . .most of them live above my overhead cupboards in very large Decor containers.

So what about all the washing up it creates? Considering we don't have a dishwasher I do feel like I spend a good portion of my day at the kitchen sink so it's not really too much effort to whizz through a few extras here & there. I do however tend to be a bit slack about packing away. Especially when there's offers from Mr Loving to do the washing up (how lucky am I, right?), I jump at the chance and quickly clear the 'clean' side of the sink so he can fill it again. Problem with packing everything straight into their homes (apart from there not really being enough room for two adults to work in the kitchen at the same time) is that most times things can be slightly damp still. In central Queensland packing them into storage is asking for mould to grow, so. . .

. . I repurposed a set of plastic storage drawers into a benchtop organiser! The top tier (which I left over-full for this photo) is where I pop any clean recycling to be taken outside. The second holds an assortment of fruit and/or vegetables, depending on the weather, seasons, and day of the grocery cycle. I have kept some of the plastic punnets that fruit has come in to help organise the shelf and rotate the produce quickly & easily. These punnets are also in use on the bottom tier that holds some of Honey's bibs & wash cloths as well as a punnet of things to be packed away. Again, giving you a glimpse of real life, I didn't clear it out before taking these photos.

Do you have any brilliant storage tips? I'd love to hear them in the comments section below!

Details of my tools & toys can be found on this page.

~J

Disclosure: This is not a sponsored post. This post was written for Loving Lunches. No product was received for this post. All opinions expressed are my own, based on my personal experience with the product.
Pin It button on image hover